How to Create an Animation on Blender
The number of people watching 3D animated videos is on the rise. It is gaining huge popularity each day. Starting with kids and even adults, 3D animation videos are enjoyed by everybody. But how do they create an animated video, you might wonder?
The 3D animation software Blender can help you to create amazing animated videos. When you will create animation on Blender, you will encounter various processes such as texturing, lighting, and rendering.
What is Blender?
Blender is a 3D application that combines texturing, modeling, lighting, animation, and post-processing capabilities into a single package. Blender animation software offers cross-platform flexibility and a tightly integrated workflow, thanks to its open design.
Steps to Create 3D animation in Blender
Step 1:
To create an animated video we have a stage, two curtains, and a character in this case. We’ll also include sound, animation, and camera movement. In this example, we’ll employ backgrounds, textures, and other elements. To keep your project structured, you’ll need to first create folders.
Then start Blender to create the setting you want. For instance, we may create a stage by combining two planes and placing our character in the center. As a result, you’ll need to utilize an animated character. You’ll also need to use two different textures.
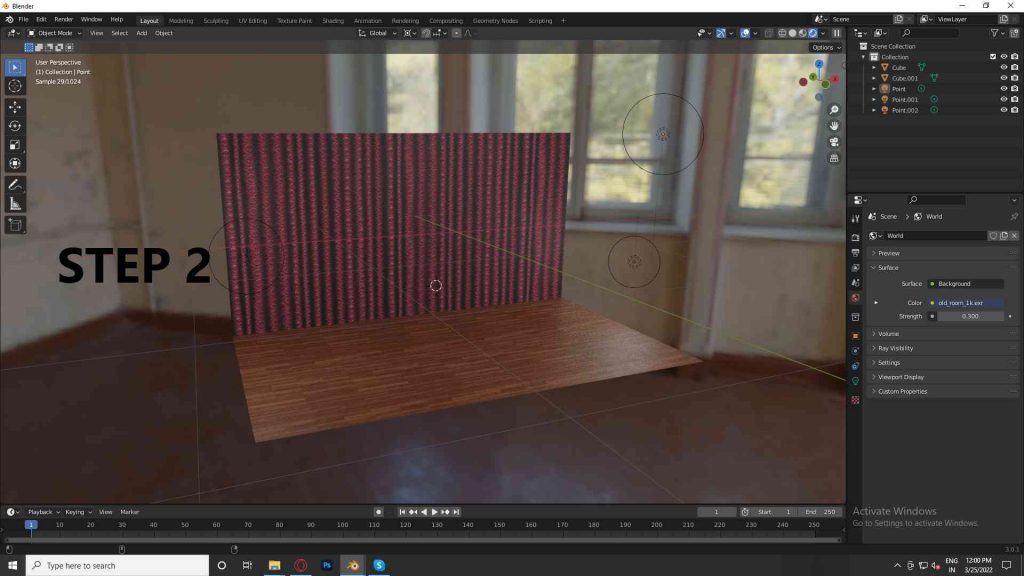
Create a plane in the bottom menu by going to Add > Plane. You can add two planes to your viewport, and rotate one of them to use as a back wall. You can adjust its position and size accordingly.
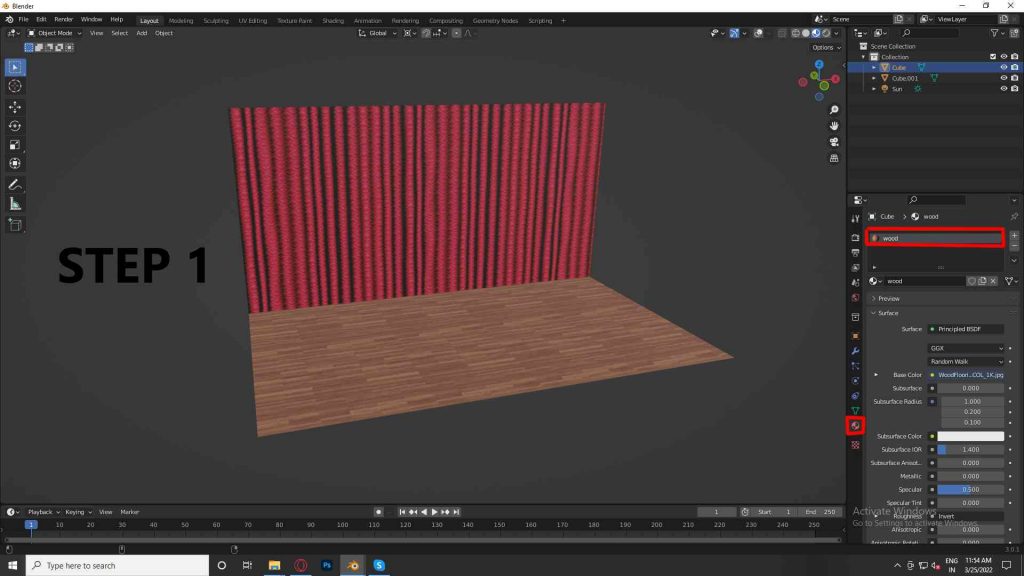
Step 2
Now you’ll need to upload two textured images. In the user settings, make sure that images as planes are turned on. Use the materials section of Hierarchy to add the texture. For our stage, we’ll need a wood texture, and for the curtains, we’ll need a crimson curtain texture.
One of the most important tools for making a good and attractive 3D animation is its lighting. Why? Because if you have bad lighting then the images and objects will not render properly. Now you have to use and set up the feature 3- Point lamp.
For creating a better color effect as well as HDR lighting, you can make use of 3 Spotlight lamps. For making a scene more realistic and brighter, HDR lighting helps a lot.
Although, HDR maps are expensive but can be “worth it” for the animators. It adds more sharpness and brightness to a scene. So then how to add an HDR?
Firstly, you have to click on the world icon which is visible on the screen and add an environment texture of your own choice. Then look at your left-hand side there will be a color section. Now you have to click open the HDR file.
Step 3

In the third step of creating an animated video you have to import a character that you have selected, now you have to add animations to it. Now, move your cursor to go to File > Import and then import your created character into the scene. Now you can move the character in the object mode by selecting its bones.
On your keyboard Click A, twice so that you can select all. Now let’s see how to change your created animation view. It is crucial that you space out the keyframes properly when you are creating an animation. As you space out the keyframes more and more, your animation becomes seamless. We are moving the head of our character and opening his mouth right before playing the audio.
To create an animated video, you must animate the planes in and out of the scene if you wish to add curtains. Add two images as two planes.
Step 4
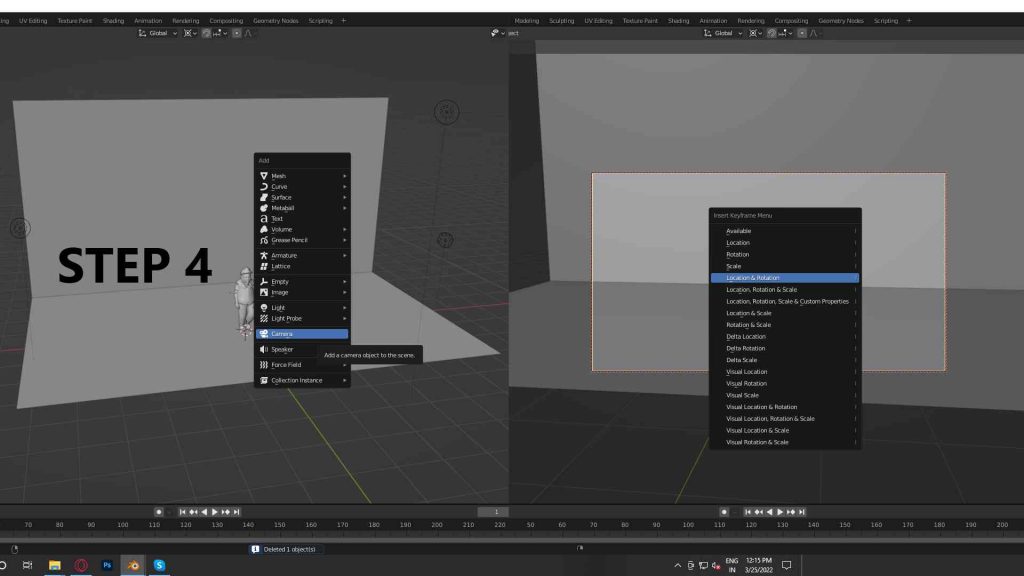
The camera is treated as an object in the Blender software. You have the option of moving, deleting, resizing, or animating the object. Now you have to go to View > Camera if you want to check where your camera is pointed at.
In the animation menu, you can set up a side-by-side view. Simply turn on your camera and adjust the keyframe. You can adjust your keyframe just by moving your camera closer to the character, and then moving it back to reset it.
Step 5
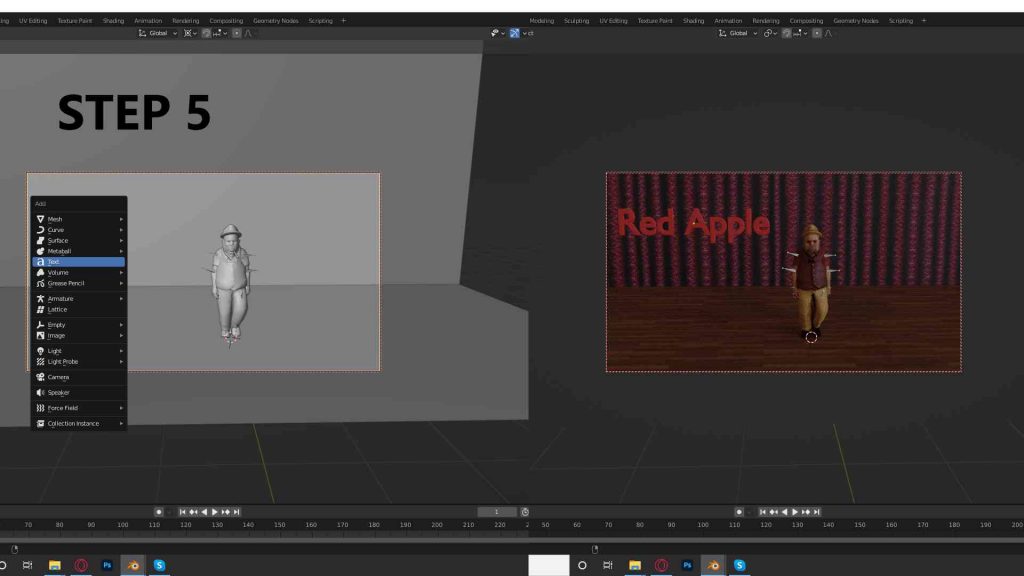
Let’s now add some text. Blender makes it simple to animate and add text.
By going to the default Window> Add> Text and selecting Edit Mode, you may change the text, duplicate it, and add many more features.
text can be regarded as an object as well. You may also modify the color and texture of animations, as well as animate them in your style, using the software.
Step 6
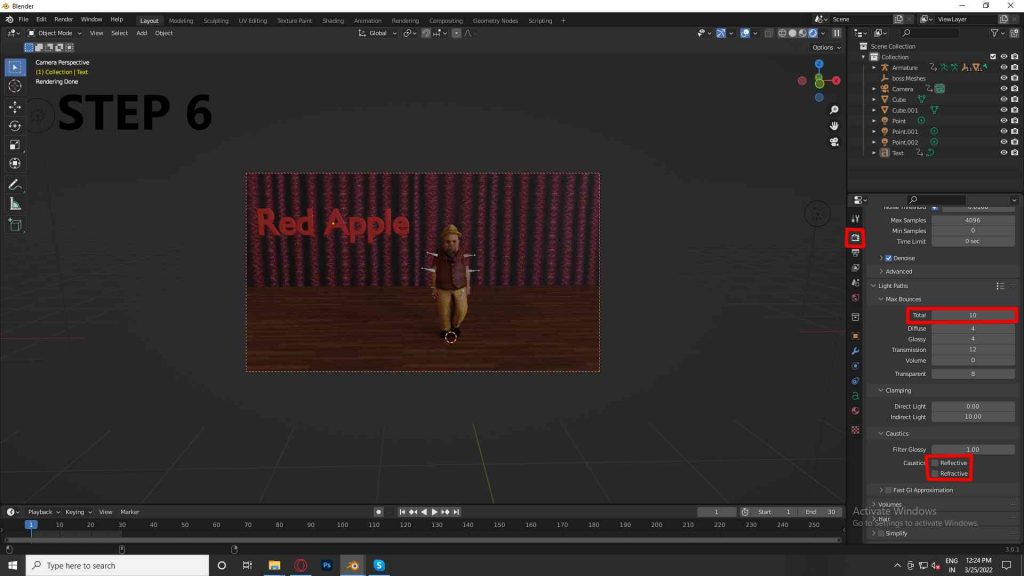
In order to render your videos effectively, you have to save the still images from your videos as PNG files. Make a separate folder for your images and render your scenes as PNGs.
Uncheck from the refractive and reflective caustics and now lower the bounce s to a minimum of 1 and max to max 10.
To create an animated video, now you have to use your GPU render and then check the one which you are using in Settings > System. Try to use multiple importance by sampling and by finding this option which is under the world icon for HDR. You can also try to use the clamp feature indirectly.
Step 7
There are properties pane in the video editing tool viewpoint. In the window, you can see the framerate as well. Then export the folder options as well as the export folder. For audio, you can utilize the MP3 format and then click render. And your final video will be ready in minutes.
Simply using tutorials is going to be difficult for an aspirant who wants to become a successful animator. So for them, it is really important to join an institute for gaining holistic knowledge from industry professionals. So for the rescue, there are several 3D animation courses.